When your iPhone displays the dreaded “iPhone Unavailable” message after multiple failed passcode attempts, it can feel like a major roadblock. Typically, solving this issue requires connecting your device to a computer and using recovery mode. However, if you don’t have access to a computer, there are alternative methods you can try. In this comprehensive guide, we’ll explore how to fix iPhone Unavailable without a computer by leveraging the Find My iPhone feature, using waiting periods intelligently, and ensuring you’re prepared for similar issues in the future.
Understanding the “iPhone Unavailable” Message
Before diving into how to fix the problem, it’s important to understand what causes your iPhone to display the “Unavailable” error. This security measure is triggered when:
- Multiple Incorrect Passcode Attempts: Entering the wrong passcode repeatedly locks the device as a protective measure against unauthorized access.
- Extended Lockout Periods: After a series of failed attempts, your iPhone might display a cooldown timer (e.g., “Try again in 1 minute,” “Try again in 5 minutes,” etc.) before allowing further attempts.
- Permanent Disablement: In severe cases, if too many incorrect attempts are made, your iPhone may become permanently disabled, making it impossible to access without a complete reset.
Understanding these scenarios helps determine the appropriate course of action—especially when you can’t connect your iPhone to a computer to restore it.
Precautions: Back Up Your Data and Know Your Options
Before proceeding with any fix, please be aware:
Risk of Data Loss
Most methods to resolve the “iPhone Unavailable” state, particularly those involving remote erasure, will delete all data on your device. It’s crucial to ensure that you have a recent backup stored either on iCloud or another secure location.
Confirm Find My iPhone is Enabled
The primary method we’ll discuss relies on using iCloud’s Find My iPhone feature. These steps cannot be performed if this service isn’t enabled on your device.
Stable Internet Connection
Whether you’re using another iPhone or an iPad, ensure that the device you use to access iCloud is connected to the internet.
Taking these precautions into consideration will help reduce stress and prevent any unintended loss of valuable information.
Method 1: Using the Find My iPhone Feature on Another iOS Device

If you have enabled Find My iPhone on your locked device, you can fix the “iPhone Unavailable” problem without a computer using another iOS device. Here’s how:
Step 1: Accessing Find My iPhone on Another Device
- Borrow an iOS Device: If you don’t have access to a computer, you can use a friend’s or family member’s iPhone, iPad, or even an iPod Touch.
- Open the Find My App or Use Safari: On the borrowed device, either open the Find My app directly or use a mobile web browser like Safari and navigate to iCloud.com. Log in with your Apple ID credentials.
Step 2: Erasing Your Locked iPhone
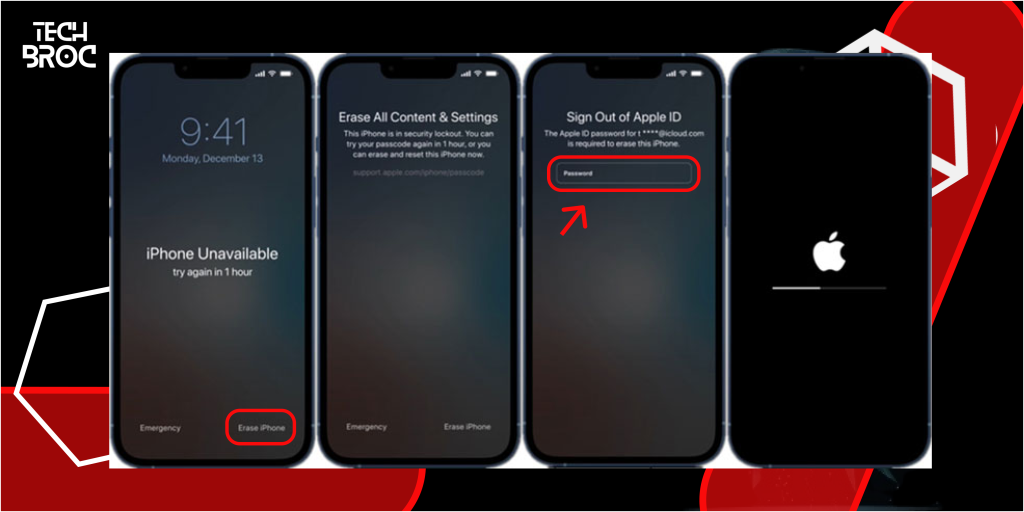
- Select Your Device: Once logged in, tap on the “Devices” tab and select your locked iPhone from the list of devices associated with your Apple ID.
- Initiate the Erase Command: Tap on the “Erase iPhone” option. This command will remotely wipe your device, removing the passcode and “iPhone Unavailable” error.
- Confirm the Action: Follow the on-screen prompts to confirm the erase process. This process may take a few minutes, so please be patient.
Step 3: Restoring Your iPhone
- After Erasure: Once the erase process is completed, your iPhone will restart and display the “Hello” screen.
- Set Up Your iPhone: Follow the on-screen instructions to set up your device. When prompted, sign in with your Apple ID and choose to restore from your latest iCloud backup if available.
- Data Recovery: If you have a recent backup, your data will be restored seamlessly after the setup is complete.
This method is highly effective if you have Find My iPhone enabled, as it provides a computer-free solution to unlock your device safely.
Method 2: Waiting for the Cooldown Period and Reattempting the Passcode
Sometimes, your iPhone might only be temporarily locked due to failed passcode attempts. If you believe you remember your passcode and haven’t reached a state of permanent disablement, you might try the following:
Step 1: Wait for the Timer to Expire
- Observe the Timer: When your iPhone is unavailable, it typically displays a timer (e.g., “Try again in 5 minutes”). Wait for the indicated period before entering your passcode again.
- Use the Time Wisely: Take a deep breath, and use this time to recall your correct passcode. Rushing in could result in further complications.
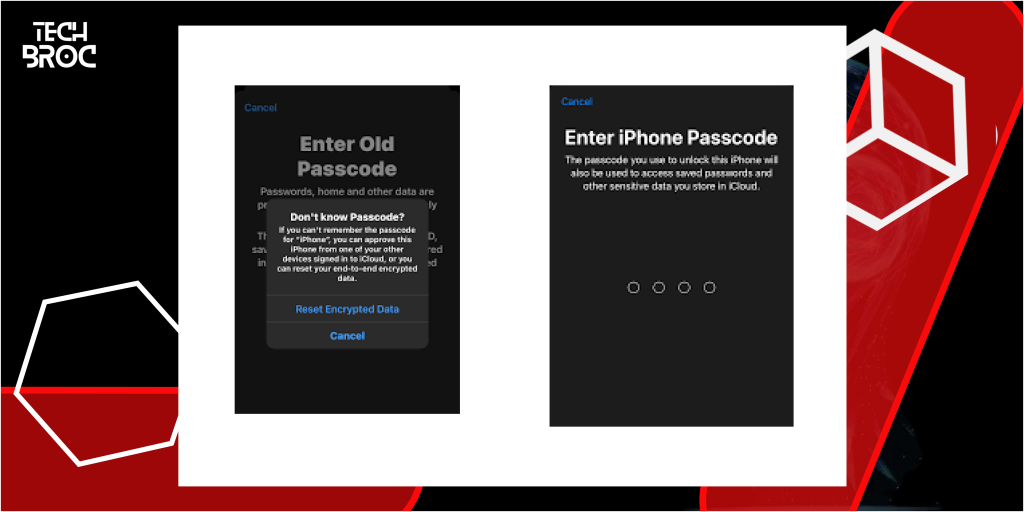
Step 2: Re-enter the Correct Passcode
- Careful Entry: When the timer resets, carefully enter your passcode. If you’re confident in your memory, this method might quickly restore access to your device.
- Avoid Further Mistakes: If the passcode is incorrect, your iPhone might extend the cooldown period, increasing the risk of eventual permanent disablement.
Step 3: If Unsuccessful
- Consider the Remote Erasure Option: Should you find that you’re unable to recall your passcode correctly after multiple attempts, it might be safer to proceed with the remote erasure method outlined in Method 1.
This method is less drastic than remote erasure, but it comes with the inherent risk of further lockouts if the incorrect passcode is entered again.
Additional Tips and Considerations
1. Ensuring a Stable Connection
- Reliable Internet: Whether you’re using the Find My iPhone method or simply waiting for a cooldown period, a stable internet connection is crucial. Ensure your device is connected to Wi-Fi or cellular data.
2. Regular Backups Are Key
- Enable Automatic Backups: Regularly back up your iPhone using iCloud. This habit ensures that, in case of emergency, you can restore your data after performing a remote erase.
- Check Backup Settings: Go to Settings > [Your Name] > iCloud > iCloud Backup to verify that backups are enabled and recent.
3. Use a Passcode You Can Remember
- Simplicity Over Complexity: While it’s important to secure your device with a passcode, consider using one that you can reliably remember.
- Consider Biometric Options: Enable Face ID or Touch ID if your device supports it. These features not only increase security but can also help you avoid getting locked out due to forgotten passcodes.
4. Know When to Seek Professional Help
- Apple Support: If your attempts to fix the “iPhone Unavailable” error without a computer fail, or if you’re not comfortable proceeding with these methods, don’t hesitate to reach out to Apple Support or visit an Apple Store.
- Service Centers: Authorized service centers can provide guidance and support for troubleshooting issues that require professional intervention.
By keeping these additional tips in mind, you can better prepare yourself for any future instances of being locked out and reduce the risk of similar issues occurring again. If you’re dealing with iPhone issues, you may also find these guides helpful. Learn how to clean your iPhone’s charging port to prevent charging problems, fix an iPhone charging port that’s not working, or resolve the white screen of death without losing data on iPhone.
Frequently Asked Questions (FAQs)
What Does “iPhone Unavailable” Mean?
Answer: The “iPhone Unavailable” message appears when the device has been locked after too many incorrect passcode attempts. It is a built-in security measure designed to prevent unauthorized access.
Will Remote Erasure Remove All My Data?
Answer: Yes, remote erasure will completely wipe your iPhone, including all data, settings, and media. It is essential to have a recent backup (via iCloud or another method) so you can restore your data after the device is reset.
What If I Haven’t Enabled Find My iPhone?
Answer: If Find My iPhone was not enabled prior to getting locked out, the remote erasure method won’t work, and you might need to seek alternative solutions. In such cases, using a computer with iTunes or visiting an Apple Store may become necessary.
Can I Fix the Error Without Erasing My iPhone?
Answer: If your iPhone is just temporarily locked (displaying a cooldown timer), you might be able to fix it by patiently waiting for the timer to expire and then carefully re-entering your passcode. However, if the device is permanently disabled after too many failed attempts, erasing the device is usually the only solution.
How Can I Prevent Future Lockouts?
Answer: To avoid future lockouts, ensure that you:
- Use a passcode you can easily remember.
- Enable biometric authentication (Face ID or Touch ID) for quick and secure access.
- Enable Find My iPhone and schedule regular backups to iCloud.
- Consider periodically reviewing your security settings to keep them up-to-date.
Conclusion
Dealing with the “iPhone Unavailable” error can be stressful, but you don’t always need a computer to fix it. By leveraging the Find My iPhone feature on another iOS device, you can remotely erase your device and restore it from a backup. Alternatively, if the lockout is temporary, patiently waiting for the cooldown period to end may let you re-enter your passcode correctly.
How to Fix iPhone Unavailable Without Computer is now within reach if you follow the steps outlined in this guide. Remember, the key to minimizing disruption is preparation—keep your backups up to date, enable Find My iPhone, and choose a passcode that balances security with ease of recall.
By taking these proactive measures and understanding your options when faced with a lockout, you can confidently manage your device even in challenging situations. If you ever encounter issues beyond your control, reaching out to Apple Support or visiting an authorized service center can provide further assistance. Stay secure, stay prepared, and keep your iPhone’s accessibility intact.
With the guidance provided here, you’re well-equipped to handle the “iPhone Unavailable” error safely and efficiently—without needing a computer. Happy troubleshooting, and may your iPhone always be at your fingertips!
For more helpful tips on iOS troubleshooting and device management, explore our other guides and resources. Whether it’s enhancing your device security, optimizing settings, or learning new features, we’re here to ensure you get the most out of your technology.